Saturday, 27 July 2013

Satisfying My Inner Child

In 2008 my grandmother passed away.  Whilst my parents were sorting through her stuff they found this article that she had kept. It is a letter I sent to Bunty magazine in 1985/86 bemoaning the fact that due to peer pressure I was being asked to give up playing with my dolls at ten years of age, and grow up too soon.


I just want to let ten year old me know that at 38 I still get to play with dolls, but now I make those dolls, and it makes me so happy.


This is me aged about 8 with my new christmas toys - a Sindy doll and baby doll


I got £5.00 for that letter to boot!


Thursday, 25 July 2013

Little Doll Reveal

So I can finally tell you more about the little doll I reviewed in my last post.  She was a gift for a friend's birthday, and now that she has her I can reveal all.


Firstly I began making the head/face.  I used 4mm glass beads for the eyes.

Here you can see I've added the upper torso.  I had toyed with the idea of making a soft body but then I decided against it and went with a full clay doll.  You can see the armature wire and that I've padded/wrapped the wire with masking tape.


I added clay to the whole armature and series baked to avoid smooshing everything I had done.  Here I've given her some boobies and a nice cleavage, and once baked and cooled I painted on some underwear.  I added hair and painted on the makeup with acrylic paints. 


Here you can see I've painted on the bra and tights, painted her nails and painted her shoes.


Here I've glued on the dress bodice and the net underskirt.  She has some glue on her arm and chest which I removed with a craft blade once it had dried.

 
Here the dress is complete, but her hair needs cutting and tidying.

Also the shoes are missing some bling.


Front view.


Here I've added her to a glass jar I have decorated with some bling.


 Front view.

Here I've added a little bling to her hair.


Here is the finished doll.  You can't see very well in this photo but I've added a little handbag to her hands.

I hope that Rhian likes her little doll.  I really enjoyed making her.


Tuesday, 16 July 2013

Work In progress

I've been working on a new little doll for a few weeks now.

She is a surprise so I can only show you a couple of early stage pictures at the moment.


This is with the head sculpted and I'm beginning the body.


She's a bit exposed here.

She is a sitting doll made entirely from Fimo Soft.


Repaint

I've spent some time today repainting my little fae girl.  A few people have said she looks like me when I was a kid so I decided to give her brown eyes.

She has pale pink lips and nails.


Saturday, 13 July 2013

Finished

I have finally finished my Rhian doll.

I added some lace to the umbrella and some beads to cover any sharp edges.

So here she is all finished

Tuesday, 9 July 2013

Under my Umberella

Well the umbrella is coming along now.  I've covered it with the dotty material.

I've snipped off the excess wire too.

This is how it looks inside now.

Tomorrow I will add the pole.


Monday, 8 July 2013

Dress you up

Well today I've been putting the finishing touches to my Rhian doll.


She now has her dress on and a little bolero jacket.  The hair has become untidy again. I need to get a small toothed comb to brush through that mop.

I have also been working on the skeleton for the umbrella she will eventually hold.

It's not been easy and I still don't know how it is going to turn out yet.


This is how I've added the spokes.

I will eventually add on the polka dot fabric.

As well as adding finishing touches to Rhian I have also removed the eye paint from one of my earlier dolls so that she can have lovely eyes too.

Wednesday, 3 July 2013

Rhian - A Work In Progress

So this last couple of weeks I have been working on a new doll I'm calling Rhian.  She is based on a lady I work with (called Rhian) who likes to wear red, and actually wore a red and white polka dot rockabilly dress to get married in.

This is where my dolls start out, although this is not Rhian's head, this belonged to a previous doll I did not go ahead with (excuse the pun).

I combined two different doll artist's techniques in making this doll.  I used Dawn Schiller's technique for putting the armature together and measurements, then I followed Wendy Froud's technique for make the upper torso.

Here are the hands and feet I made.  I left the legs on the wire and then joined this onto the leg armature once baked as it makes the leg armature stronger.  Also I couldn't remove the wires as I used some foil and tape underneath to make the legs shaped a bit better.

The hands I had to remove from the wire as it is difficult to attach to the armature wire, and this wire was too long, giving her ape-like arms.


Here she is after baking, and the limbs are attached.  She has had some stuffing glued on.  She is holding what will become an umbrella eventually.


 Here I've begun to paint in the features.  Pencilled in where the eyebrows will go and I've laid down some blue for the eyes.


 Here I've painted in the eyebrows (a good tip is to mix some brown paint in with the black so that it doesn't look too harsh and unnatural).  I've added pupils and highlight to the eyes.  I used real eyeshadow and real blusher to add colour to the eyelids and cheeks.  The lips have been painted with red.  Eyeliner had been painted on using the brown/black paint.


Here I've added some eyelashes to one eye and you can really see the difference it makes to her face.  I use false eyelashes from a pound shop (dollar store for the Amercians out there).  Snipped off what I needed and trimmed them to the right length.  I think these look better than trying to attach some of the hair to the eyes.  I've seen a lot of dolls that look like someone glued eyelashes into their eyeballs.


 Here she is with both sets of eyelashes attached.  At this point I've put some Fimo gloss varnish over the lips.  I've painted a little pinky purple into the corner of the eyes, and used the Fimo gloss varnish to add shine to the eyes.


Here she is trying on the dress I made for her.  At this point I've painted some red shoes onto the feet and added a little bling to make buckles.  I've covered the arms, torso and legs with nylon, but I wasn't happy with this so I've  since bought some felt in a flesh colour.  It is really difficult to find a stretchy material for sale in fabric shops, and to be honest the internet is quite a rip off these days - if you do manage to find something cheap, then they stiff you on the delivery charges, so I try to buy local as much as possible now.


Oh and the hair is made from 100% merino wool I bought in a local craft shop.  It is lovely and soft but mats up easily so need to be combed through with fabric conditioner.

I may buy some cheap white t-shirts in the future and dye them myself.

So this is where I am at the moment.  I still have to make the umbrella which has turned out to be quite a challenge.  I have to finish sewing the felt on.  I have to make a bolero jacket to cover her arms.

I will be posting more photos as I progress.

I have just bought some Fimo Puppen clay to try next.  Unfortunately the craft store I bogught it from only sells it in white, but I would be paying £5 more to have it from the internet so I will make do for now.  It will be interesting to make white dolls.  I may mix some of the flesh coloured Fimo soft I have left into it to see what I get.


Little doll BIG hassle!

So as I said I got distracted making another doll whilst doing the other head.

I wanted to make a full body sculpt again, but decided to make a smaller doll.  What a pain that turned out to be!

I knew I wanted to make a cyber goth/punk doll, and that had been my intention with the previous head I'd been working on.  I liked the idea of making a smaller doll and also sculpting the clothes.

First off, making smaller hands is a right pain.  It's hard not to break off the fingers as you add details to the hands and the fingers are difficult to pose.  One hand is hard enoguh but then you have to try to match the other hand.

I also wanted to make some platform boots/shoes, but there are zero tutorials on the web for how to make these for polymer clay dolls.  Most tutorial are for cloth shoes you fit to the doll after baking, or they are instructions for resi cast shoes for dolls such as Barbie or Monster High.

So I managed to find a pattern and after much fiddling and serial baking (where I worried there would be burning) I managed to make some boots, but they are not amazing.

After sculpting the body and baking the doll, I attached clothing and baked again, ensuring to cover the finger with a damp cloth to avoid burning.  Annoyingly after baking and leaving to cool, I was inspecting her and parts of the gloves were braking off and a little of the skirt broke off.  By this time I was thoroughly fed up with the whole process and vowed never to make a full sculpt ever again.

I used to have terrible patience and would abandon things half way through, but something that sculpting has done is given me the drive to finish things properly, so I decided to finish the doll even though there were some flaws.  So I sanded and buffed and painted and glued hair on.

Here she is.


She is a cute enough doll but I'm not happy with her overall.  The wires at the bottom of her feet are there so that I can put her onto a stand I was going to make.

After this I decided to go back to bigger dolls and the soft body.

Heads Up!

Next I decided to work on some more heads.  There was the intention to give them bodies but it never panned out.  Maybe one day.


With this doll I experimented with rooting the hair into the clay pre-baking.  I found out later that the best way is to bake the head first, then add more clay and root the hair, then re-bake.  However it is not a good look anyway so I will stick with gluing the hair.

I then made this head and got carried away painting her before I finished the body.  Then I got distracted making another doll.  I may finish her at some point.


It's a boy!

After making a female doll I wanted to try to do a male.  Armed with Dawn's book I went smaller this time and decided to base my doll on the Fetch model.

Of course my hands had other ideas and before I knew it he looked nothing like the tutorial I was supposed to be following!


He is a cute little character.  I wish I had left his ears like this now.  This is him pre-baking.


Here he is post-baking, with all parts attached to the armature wire.  I chose to put his ears up and now regret it.


Here he is all finished and clothed.

Fimo all the way!

I tried to work with the Living Doll again, but I was not happy with it.  I also wasn't fussed on the colour of it.  It was a light flesh colour (I didn't like the darker flesh), but once baked it had a beigey greyish tone that did not look nice.

As I had used Fimo as a child, I though I might give it a go.  Back to the hobby shop and they only had the small blocks of what was now termed Fimo Classic and Fimo Soft.  Then I spotted a large block of Fimo soft in a sort of pinky flesh tone.  I bought it and brought it home.

I think this block had been sitting in the shop a while too as the texture felt a bit like marshmallows, but as soon as I started working with this clay I fell in love!  It held form better, was less squishy, smoothed seams nicely and as for the colour, it was just perfect!

By this point I had also bought Dawn Schiller's Fae Maker book.  I decided to try making soft bodied dolls instead of clay bodies to avoid the burning issues.  I wanted to make a doll using her template but using my own style of doll, so I made the her in my style and used Dawn's techniques for putting together a soft body, and making the hands and feet.


This was my first go at making hands and feet.  They came out cute but were a little too chunky for my doll so I made some more.

The doll was easy to make.  The Fimo bakes at a lower temperature than the Sculpey so I didn't get any burning issues, or cracking.

I made the armature according to Dawn's measurments, used pillow stuffing glued to the armature, and then used some long john material to cover the stuffing

This is how she looked at this point.


Then I made her a dress all hand sewn.


After painting and adding hair, this is how she looked.


I plan on repainting her as I didn't have small enough brushes to do a good job on the eyes and brows, and as people have expressed an interest in her I would like to ensure she is up to scratch.

Moving on

I had some money from my grandmother for my birthday at the end of February, so I used that to buy a block of Living Doll.  It may have been sat in the shop for a long time, it was crumbly and I had to work hard to knead it and soften it.  Once I got started I found it much easier to work with than the air dry clay.  Two issues arose, one that it picks up every bit of fluff and hair and god knows what else (even from stuff that is not in the same room, go figure!), second, once Living Doll gets warm it can go too squidgy.  It was winter and my hands are always cold so I wasn't happy at seeing loads of my fingerprints, and accidentally squishing features as I worked on other parts of the face/head.

I made one doll from the Living Doll clay. I made the head first and baked it and I was really happy. 


 Unfortunately after adding a body and setting it to bake, things began to go wrong.

I followed the baking instructions to the letter and followed tips I found online to ensure that she baked evenly and didn't burn or crack. 

After baking I left her in the oven to cool down, and was really disappointed with the things that went wrong.  Well somehow the hands got pushed into a weird position during baking, even though I spent ages arranging her nicely in the oven. Her lips were burnt and the nose burnt all the way through, the hands distorted, and on top of it all the clay cracked around the ankles and the feet came off.  I was really upset.

The next day I fixed the feet by adding new ones and re-baking.  The only way I could deal with the burnt bits was to paint her all over with acrylic paint.  She came out looking like an alien at the end, so not the look I intended. 


I learned some lessons from that particular doll. 


Starting Out

I have been sculpting dolls for a few months now, and after looking around the web at other doll blogs, I noticed that other doll artists don't really say much about how they got started or show their early works, which I think is a shame because we all have to start somewhere and it would be nice to see that they made some dodgy looking dolls in the beginning too!

So here is my story and my beginning sculpts.

I played with plastecine as a kid just like anyone else.  I made bad looking creations but that was all.  When I was somewhere between 10 and 13 (I only remember because of where we lived at the time) someone bought me a pack of Fimo for christmas.  I didn't really know what it was, and I made one large model of a little chinese man kneeling to pray.  My mum wouldn't let me bake the clay so he stayed soft and I don't really know what happened to him in the end.

My next foray into clay was in my 20's, and I decided to make a batman head in miniature on the back of the Batman films.  Needless to say that did not pan out well as I didn't really know what I was doing then.

Over the years I thought on occasion that I would like to make some little models that I could sell, but the idea went away quickly as I knew nothing about model making/casting.  Then earlier this year I decided to look into it again, as I now had the internet to find all of the information I needed. 

Of course once I began looking I realised that there were all kinds of models out there for me to make.  I had never heard of OOAK dolls before.  A few years ago I had toyed with the idea of making some soft sculpt dolls but that never got past the research stage, but now I was looking at all different kinds of polymer clay and air dry clay dolls, and I was fascinated.

I went to my local hobby store and looked at the price of the polymer clay and decided to go for air dry to begin with as it was much cheaper.  I came home and prodded some into a head shape and gave it a nose and poked a mouth in with a needle.  It looked terrible so I realised I needed to do some research and found some tutorials.

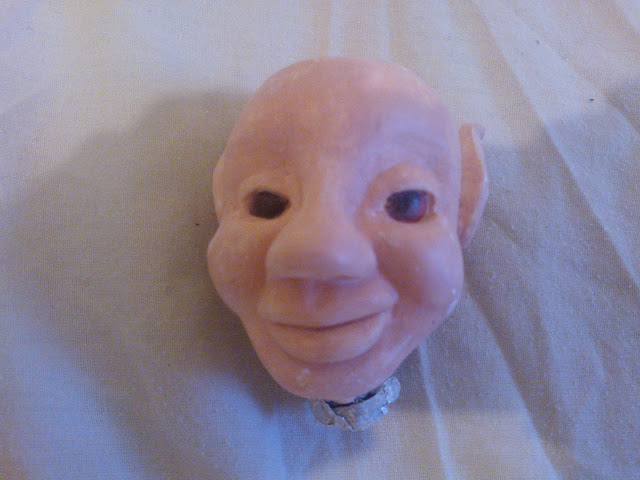
My very first head was following an air dry clay tutorial for a gnome.  Somehow it came out looking nothing like the tutorial, but bore more than a passing resemblance to my next door neighbour who had been banging about in our conjoined attic for quite a portion of the time I had been sculpting!  It was completely unintentional, but I laughed when I realised.

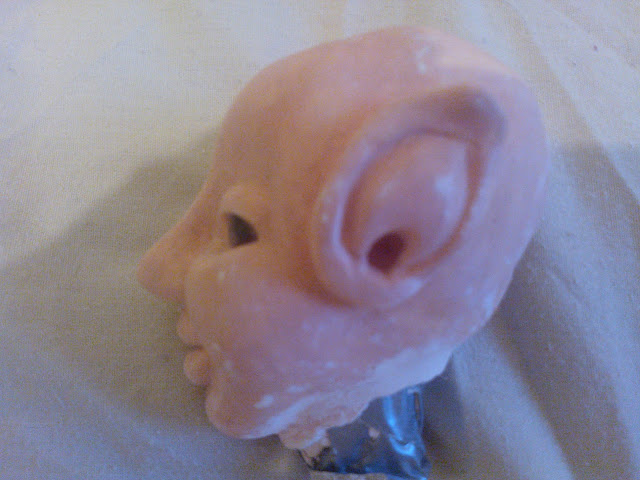
Here is a picture of that first head.  He did have ears but they broke off - one of the many down sides to using air dry clay.


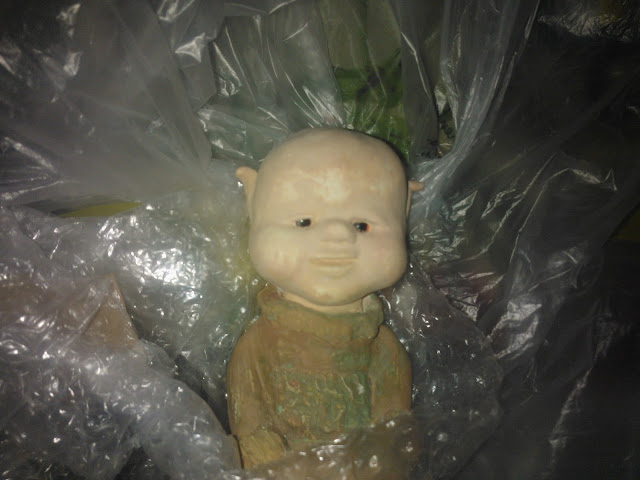
My next head went a little better. I used some teddy bear eyes and made a sort of elf head.


It was at this point that I deciede I needed to make a full body too, and this little guy was born.


My final foray into air dry clay was this lady, and after a disastrous attempt at giving her a body I decided it was time to try polymer clay.


I know that some people can work wonders with air dry clay but I was having a hard time with it, and I didn't realise how much of a hard time until I got some polymer clay.